On the Midi programming page we looked at some of the
compositional structures of Cuban style grooves and saw how simple a lot
of the basic rhythmic components could be to program with MIDI. This
month we will look a little into that elusive topic of
natural feel. One
of the characteristic things about Latin and
Ethnic drum and percussion
grooves is the elusive feels of the rhythms. A lot of
ethnic percussion
styles have their own built in feels which are difficult to pin down in
an absolutely accurate and precise way. Anyone familiar with the Samba
grooves of Brazil will know exactly what I mean when I embrace this
topic. Surprisingly, when you see these type of rhythms written down
they appear fairly straightforward, made up of predominantly straight
sixteenths. When you listen to them though, they sound anything but
straight, with a very lilted feel, much like the un-even roll of an egg.
It is a mysterious and annoying thing as a budding percussionist that
even when you can play the strokes on the drum in the right order and
with the right technique, it can still sound wrong. It is also quite
often the case that particular styles play very behind or ahead of the
beat, sometimes only in particular places in the bar or on particular
notes. Up tempo folk grooves from North India for example may be
slightly ahead and anticipating whilst a slow Latin ballad
may be
slightly behind the beat. A classical Tabla part meanwhile might have
just one note in each bar that is ‘pulled back’ in a very idiomatic way.
This type of thing really stands out with instruments such as
Bongos and Tabla where some of the strokes can be very short and staccato
and
become prominent if they do not sit in rhythmically when used out of
their natural context. For any musician, it really takes years to get
inside of these rhythms and truly understand the grooves and the way
they can be manipulated with elasticity.
Another aspect of this is the ambiguity which can be inseparably bound
within a rhythm. African drummers are masters or throwing the listener
off by stating contrary cross rhythms in a groove to create a feeling of
rhythmic tension. It is all these factors that meld together to give it
that spice and feel.
This all creates a number of problems for the would be
percussion
programmer who does not want to quantize everything as a first step.
Firstly there needs to be a way to program a groove which has an ethnic
feel and then get the other elements of the groove and song to sit with
it rhythmically. Secondly, working the other way around, there could be
a great ethnic feeling percussion audio part which is exactly the right
sound for your song but which won’t blend rhythmically with the material
already programmed.
This time we are going to use processed audio files and not
MIDI
programmed single hits. We are going to build up a multi track
percussion part similar in construct to the MIDI programming page, using individual
instruments derived from audio files. We will do this by making a set of
Re Cycle files from trimmed audio loops, importing them into the
EXS24,
building a set of sampler instruments and extracting the MIDI files into
the song within Logic.
I am using some audio files from my collection but obtaining source
material on a range of percussion instruments at the right tempo has
never been easier. There are now plenty of percussion sample CD’s and
plug in packages which have great loops and performances on them. Many
of these are mapped out across the keyboard in easy to load tempo sets.
If you do want to use one of these but do not have access to the audio
file, simply bounce it down as a separate audio file and top and tail
it. The tempos of the audio files we will use for this process can be
approximately the tempo of the song but, seeing as we will be slicing
them up in re cycle, this is not of vital importance. However, if there
is a big discrepancy you might not get the ideal result.
The re-cycle/EXS24 system of building
sampler instrument sets creates a
lot of potential outside of and away from the particular song you are
working on. Once you start to develop a comprehensive library of
material then you can have a lot at your fingertips without having to
hunt your hard drive for relevant sounds. If you use a lot of your own
processed percussion loops as well then you have the benefit of having a
unique resource which can only enhance individuality. We have included
all the prepared rex files and sampler instruments below and have also included the source audio files so you can try
building them from scratch as we do in this tutorial.
| Programming, step by
step |
Download the audio files (800kb)
Download the Re-Cycle files (2000kb)
Download the EXS24 sampler instruments (3kb)
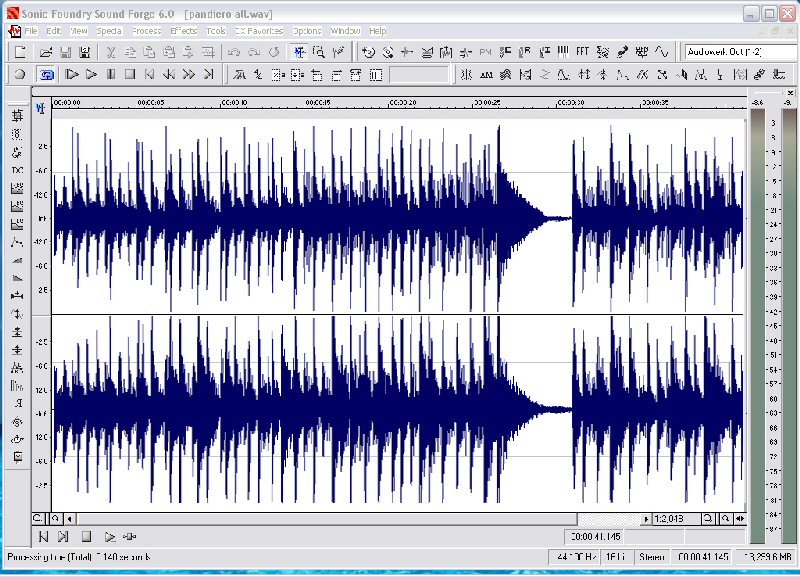
Screen shot 1
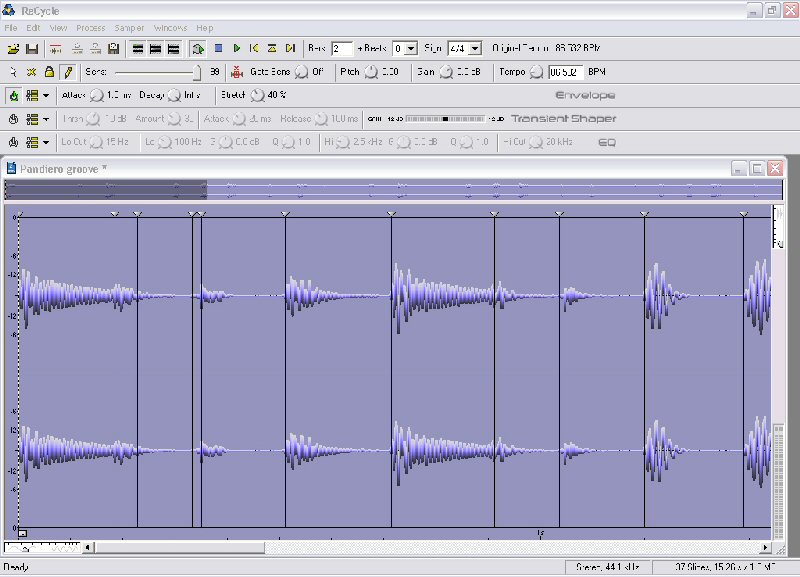
The starting point is this long loop of a Brazilian Pandeiro groove
that I recorded direct onto the computer without a click. This drum,
which is a headed tambourine and the national instrument of Brazil, has
a particularly 'lilted' feel. This will be the backbone for our groove.


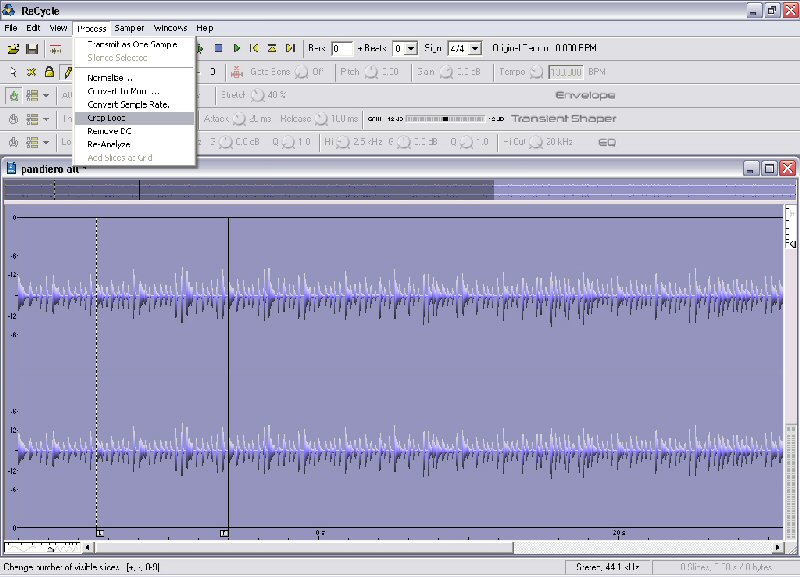
Screen shot 2
Here we extract a two bar loop from this selection. I’ve used Sound
Forge, although you can use any audio editor. Alternatively, you could
select and trim a loop section by using the left and right locators in
Re-Cycle. Choose 'crop loop' from the 'process' menu. However, Re-Cycle
will not load in samples over a certain number of minutes long so you
might need to do this elsewhere if you want to select a section from a
long audio file.
.
Screen shot 3
Here we have loaded in the trimmed audio file and indicated at the
top of the screen that the loop is two bars long. We then clicked on the
preview toggle (looks a little like a clock) and this calculated the
tempo of our loop. As it stands, the loop has not yet been sliced up so
it is still in one piece.

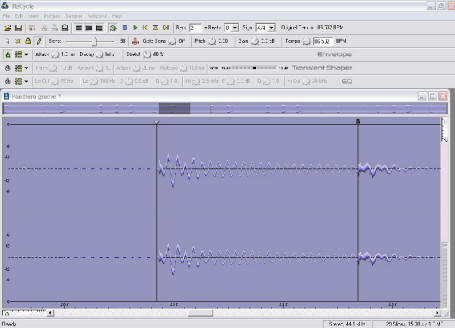
Screen shot 4
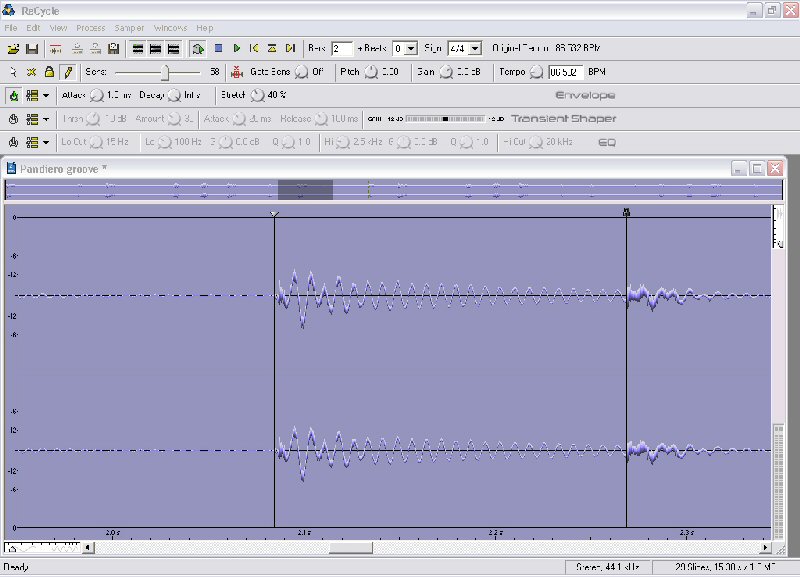
To slice our loop we need to adjust the sensitivity slider to the
right. Here we see the slider moved all the way to the right. This is
more slicing than we want. You can see on the second wave peak, that the
first impact and then the main impact have been identified as individual
slices. In actual fact, this is just one sound with the small pre-peak
being part of that hit.

Screen shot 5
We need to move the sensitivity slider back to the right to stop it
recognising all of these nuances. This then has the effect of removing
some of the slice points we want. Only with really obvious peaks, such
as a hi hat part is the slicer intelligent enough to be accurate
instantly. It invariably means that you have to check each individual
slice with the 'play slice' button and input the slice points with the
pencil tool. Zoom in nice and large to do this and audition all the
slices. Listen to the end of the slice as well as the beginning. If
there is a pop or click at the end you may need to adjust the start
point of the next slice. Like anything, there is a knack to this and a
little experimentation and persistence will pay off.
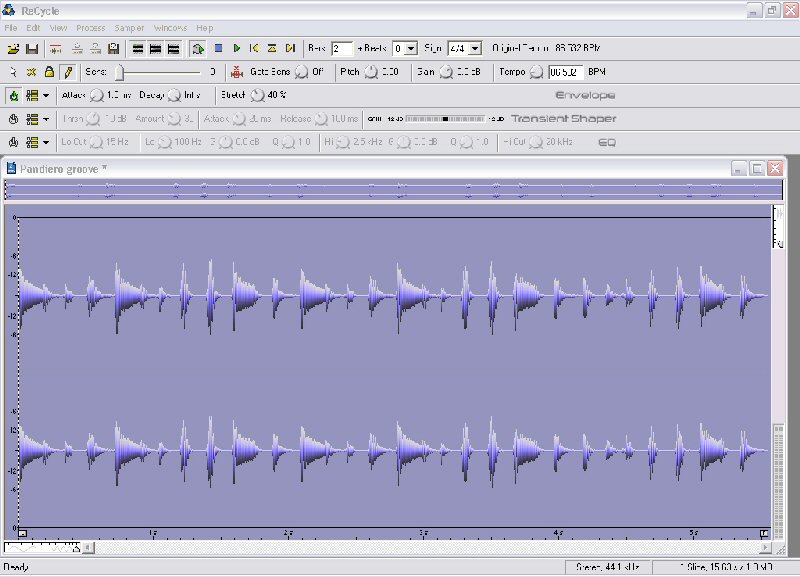
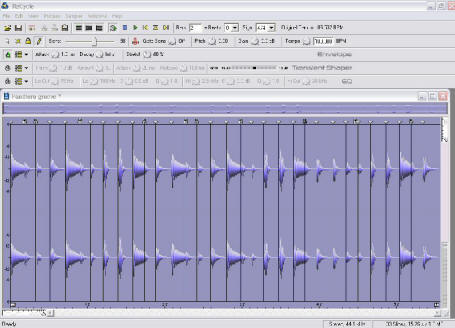
Screen shot 6
Here we see the whole loop trimmed. There is only one pre-peak which
needed an extra slice, but most of the rest of the groove is cut up in
straight sixteenths.
Screen shot 7
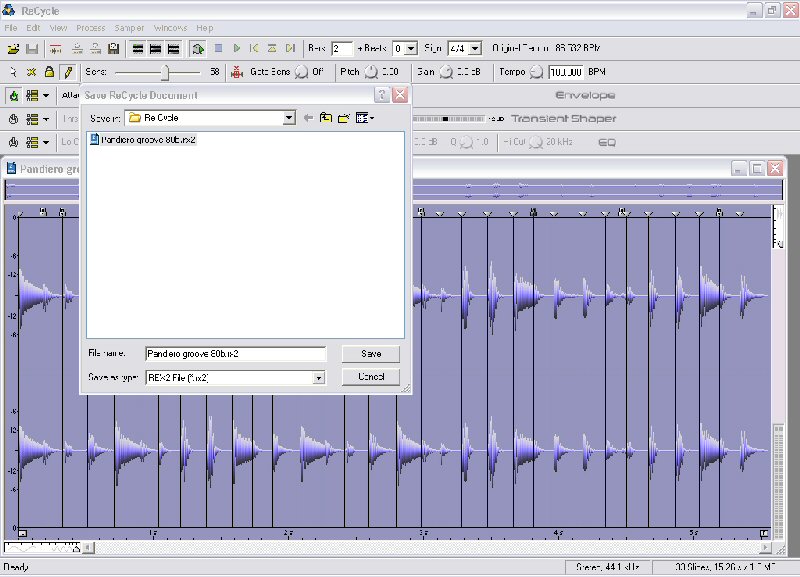
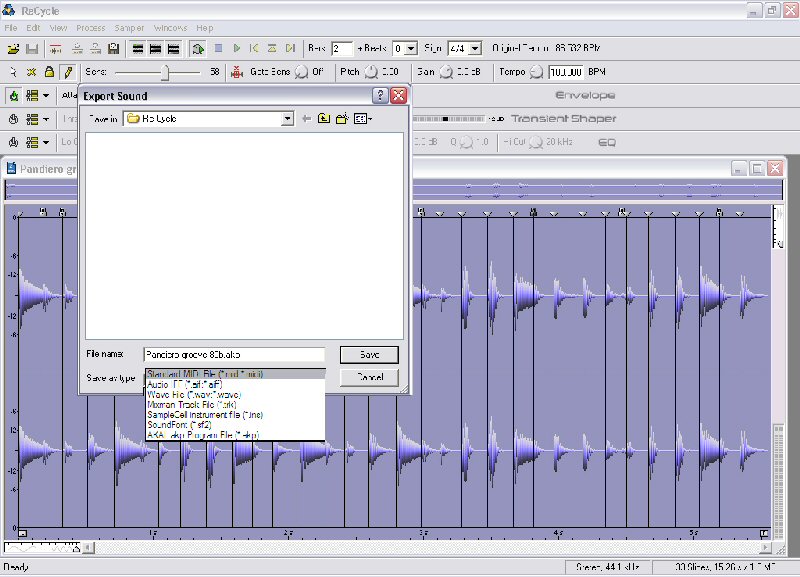
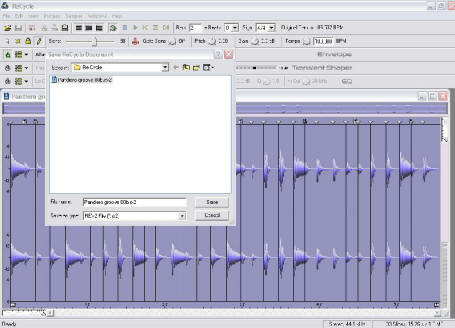
Save the file in a folder where you keep all your rex files. It is a
good idea to have a dedicated folder for these files with sub folders
for various instruments. I usually save the approximate tempo in the
file name to make future searching a little easier. I have added '80b'
which indicates 80 bpm.
Screen shot 8
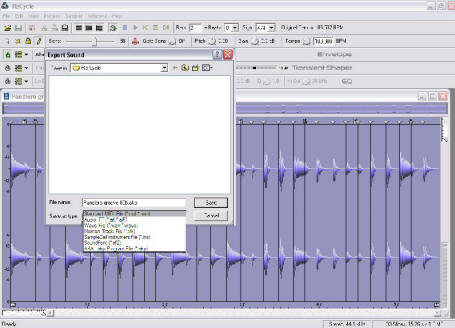
This is the Export menu in the drop down options from File at the top
of the screen which allows you to export different formats of the Re
Cycle file. We do not in this instance need to save the MIDI file
separately. The EXS24 sampler will do this for us later.
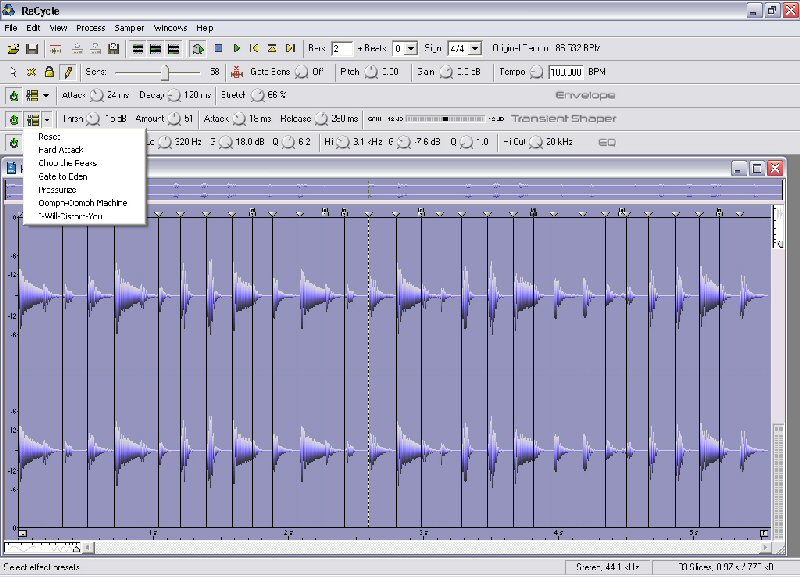
Screen shot 9
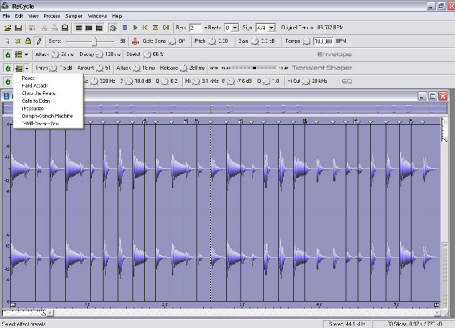
At this point you can experiment with the Transient shaper, EQ and
envelope effects above the sample display window. You can actually get
some cool effects with these. Try the silly stomper and the synth
chopper in the envelope section or else tighten up a drum sound or boost
the bass.
Screen shot 10
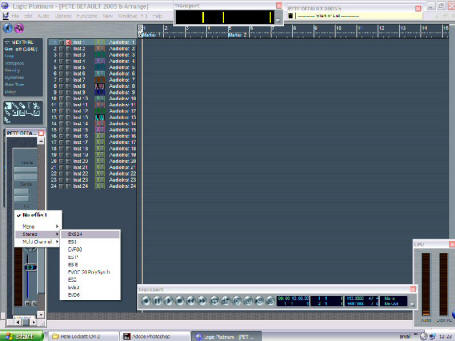
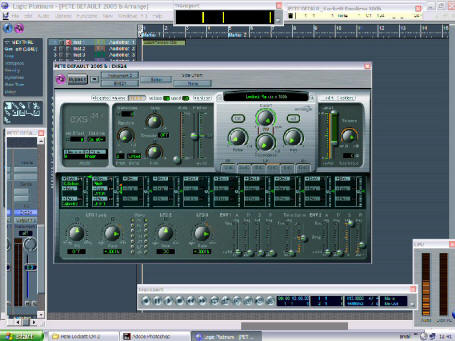
Next we need to load up the EXS24 from our Sampler instruments in
Logic. With percussion a lot of people tend to choose mono for each
instrument. I prefer to work with stereo, especially if the instruments
have been recorded nicely. You can always bounce things down later if
you want to ease up some of the strain on the processing power of the
computer, depending on how many sampler instruments are running.
Screen shot 11
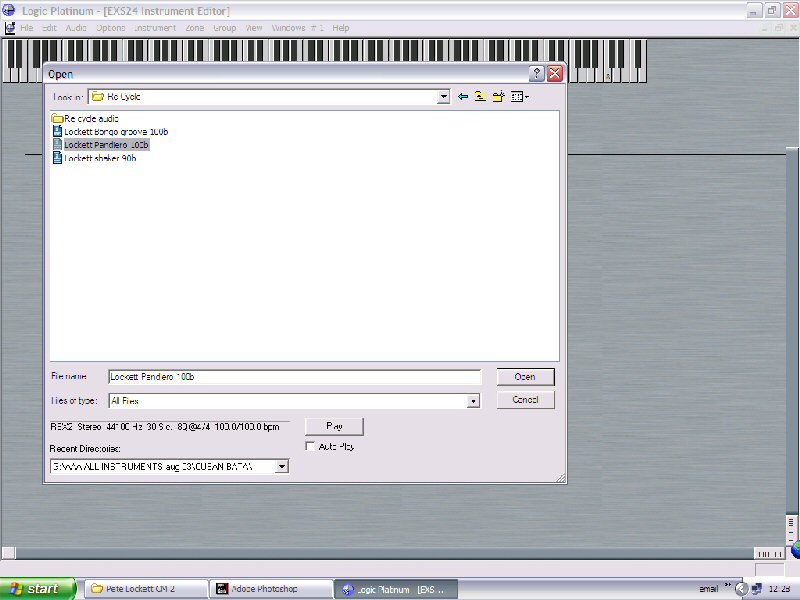
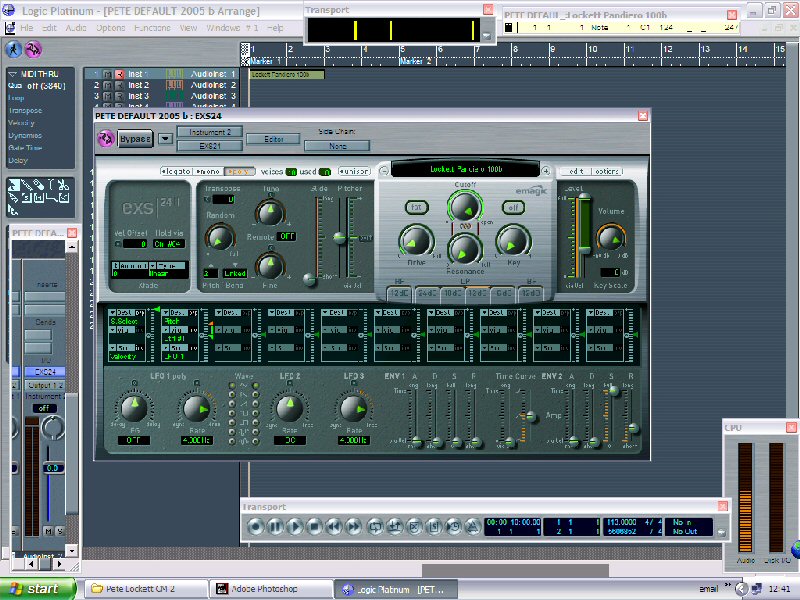
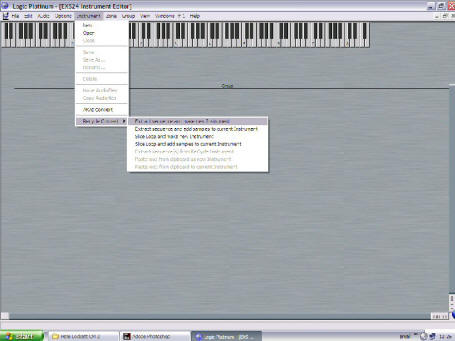
We want to import our Rex/Re-cycle file into the EXS24 as a sampler
instrument. Enter the EXS edit page and choose ‘extract sequence and
create new instrument’
Screen shot 10
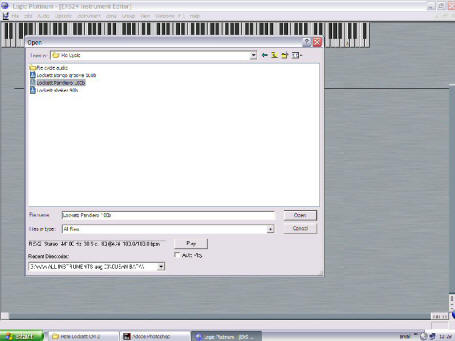
Navigate to where you saved your recently created Re-cycle files and
select the one you want. In this instance, we will choose the Pandeiro
file.
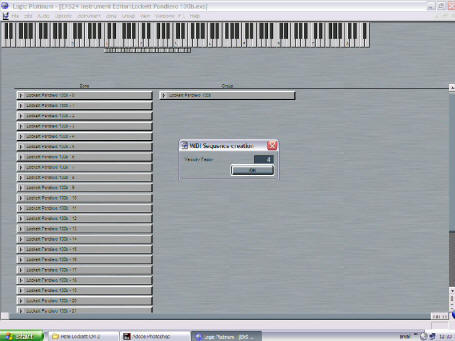
Screen shot 12.5
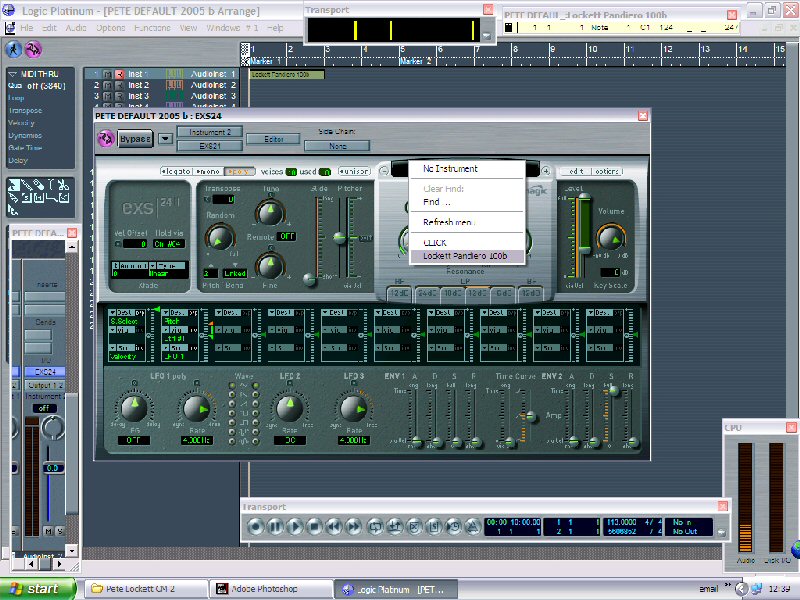
Clicking on your selection will load the individual slices of the
Rex file into the EXS24 and then display a velocity factor box. We have
chosen a setting of 4. Click OK and then close the edit window and go
back to the EXS24 display. If it has closed, re-open it. This will have
created the EXS24 instrument and will automatically have saved it in
your sampler instruments folder in the Emagic folder on your ‘C’ drive.
It will also have added a Re-cycle audio file within the same folder. If
it is the first time you have done this then it will automatically
create the Re-cycle audio folder as well.
Screen shot 14
At this point we need to select the newly created instrument from
the pull down list. The more instruments you have created then the
longer the list will be. It can become unmanageable if you do not go to
the root directory and use folders and sub folders.
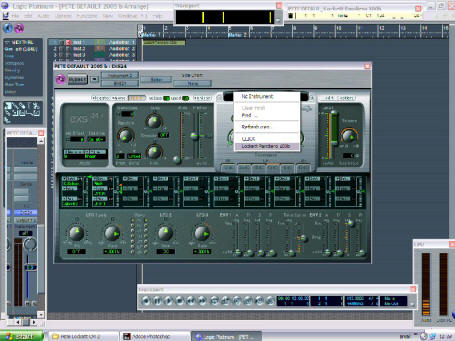
Screen shot 15
When selected, the instrument name will appear in green in the
central name box on the EXS24.
Screen shot 16
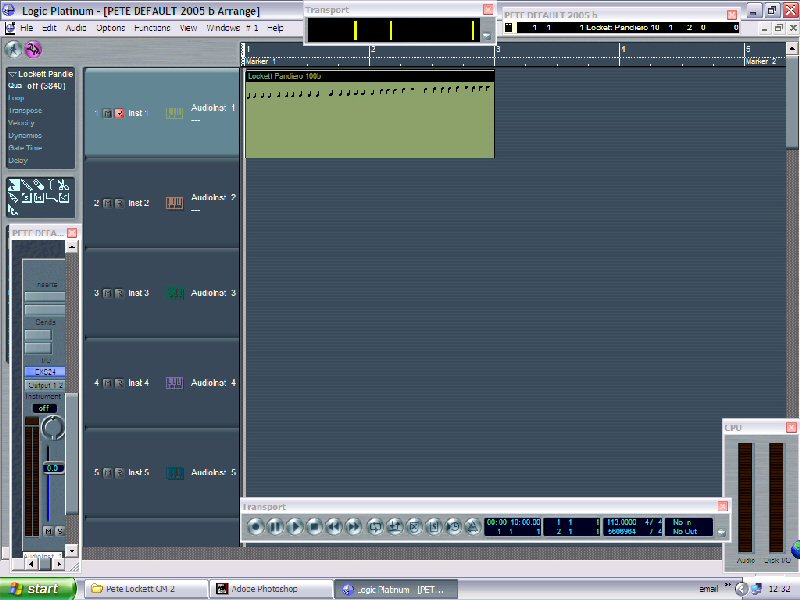
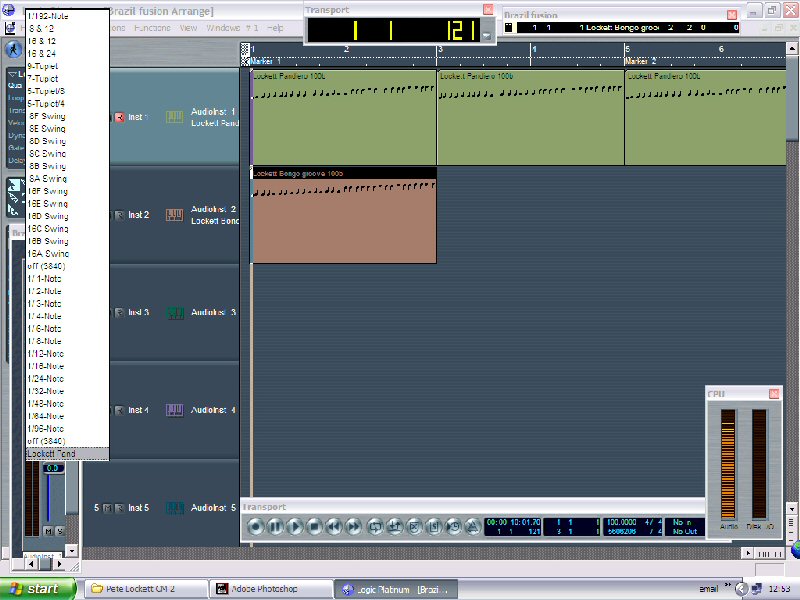
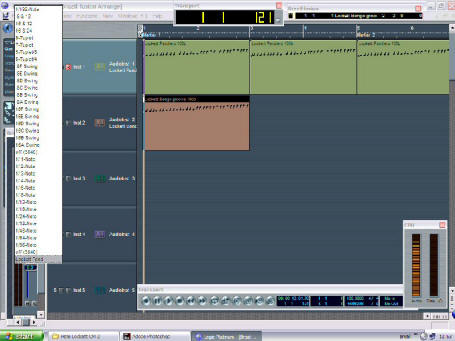
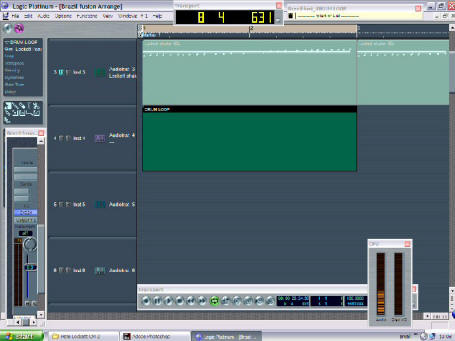
When you go back to your arrange page you will see the MIDI file of
the instrument placed on the relevant EXS24 track starting from whatever
point the song position marker was when the instrument was created. It
is a good habit to make sure your song position marker is exactly where
you want the MIDI file to be when you create the instrument. Otherwise
change the start position of the sequence in the event list for objects.

Screen shot 17
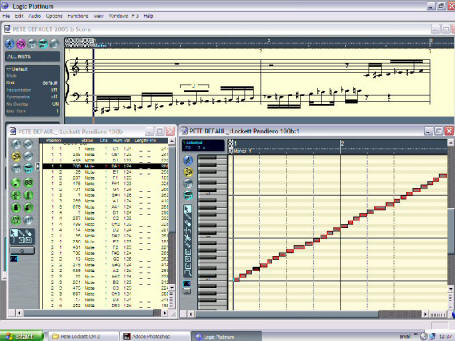
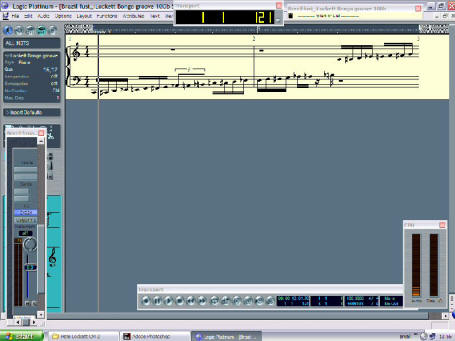
At this point all the notes are there if we enter the edit pages of
the midi file. See how Re-cycle has distributed the notes up the
keyboard from C1 upwards. Gone are the days of slicing by hand and
assigning each note a note number. Can you imagine!! You will remember
that the Pandeiro groove had a sixteenth feel. Look at the score and
event list. On paper it is anything but regular sixteenth notes. This
highlights what we were saying earlier about the feel aspect.
Screen shot 18
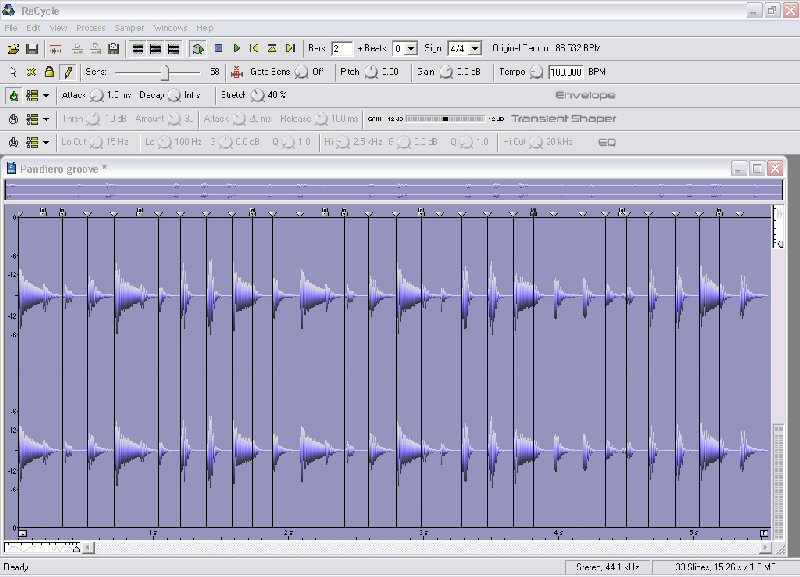
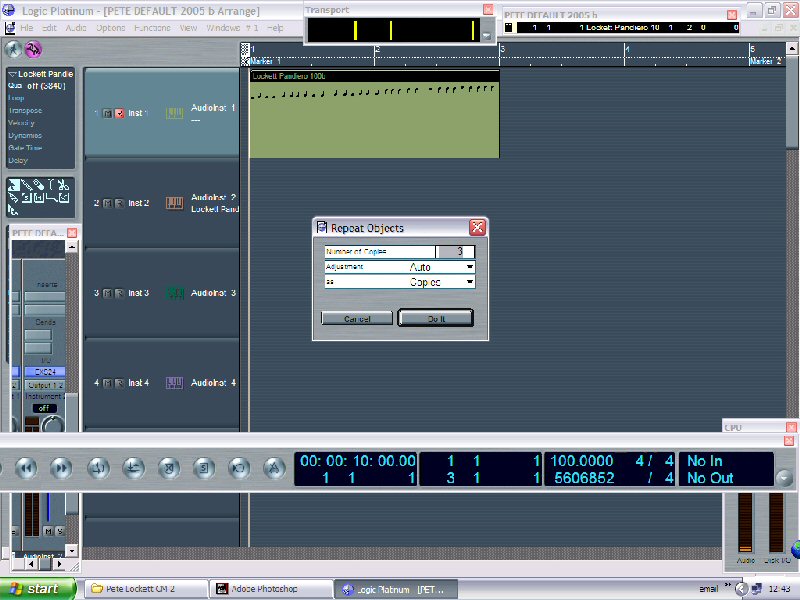
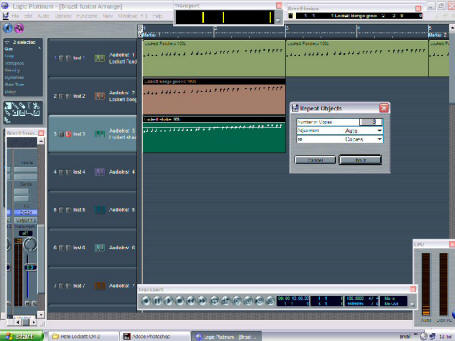
Let’s copy this to make a longer loop section. Cntrl R opens the
‘repeat objects’ box. At this point we have also changed the tempo to
100bpm. Try experimenting with the tempo. The Pandeiro part will work
from anything between 80bpm to 140bpm. There is usually less scope to
slow the tempo down with REX sequences because the audio of the slices
will not be long enough to fill the time space. However, at a faster
tempo this will not be a problem.

Screen shot 19
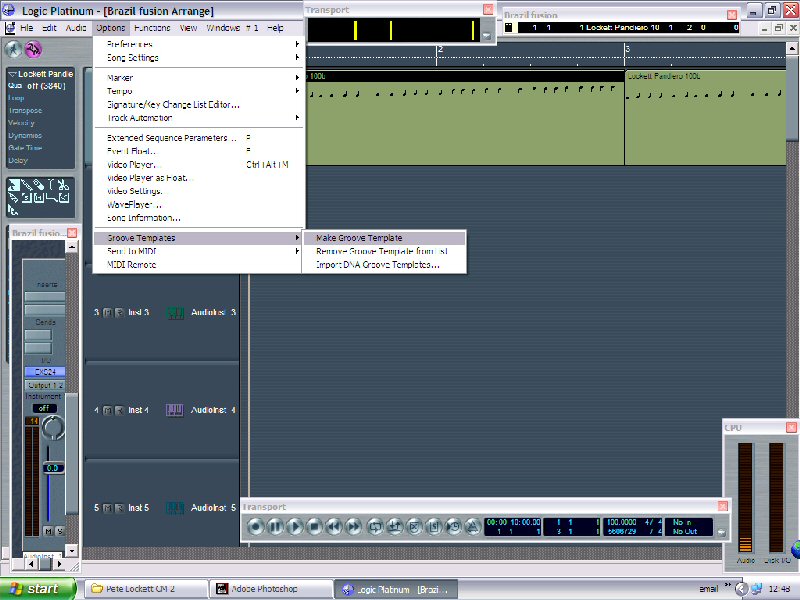
If we used this groove with straight quantized material then it
would likely clash somewhat. We need to make a groove template of this
file to make it our quantize benchmark for everything else. First select
the Part by clicking on it, then select ‘Options’, ‘Groove template’ and
then ‘Create groove template’
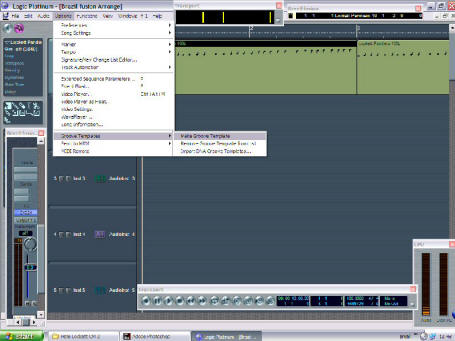
Screen shot 20
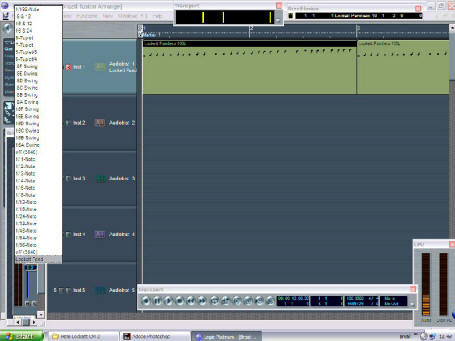
This will create a groove template based on the Pandeiro file. It
will be named the same as the file and will appear on the drop down list
for the quantize settings. Any of your other sequences in the song can
then be quantised with this template.
Screen shot 21
Here we have gone through the whole Re-cycle/EXS24
instrument-creating process to create a second part for the groove. In
this instance it is a simple Cuban Bongo pattern to go with our
Brazilian Pandeiro.

Screen shot 22
Listen to the two parts together without quantizing the Bongos. It’s
OK but a bit messy for my ears. We decided to quantize the Bongos too by
selecting the Bongo part and then selecting the Pandeiro groove template
from the quantize pull-down menu. This quantizes the Bongo part to the
template of the Pandeiro part and really makes the groove sit.
Screen shot 23
Notice how the score of the Bongo part is now very close to that of
the Pandiero. One very important point here is that the rhythms need to
be similar in the first instance for this to work. If for example the
quantize template was based on eighth notes and you tried to quantize a
sixteenth note pattern, you would end up with notes being pushed
together onto the eighth note meter. Even if there was a fill of
sixteenths at one part in the file, you would not be able to quantize
that section for the same reason.
Screen shot 24
We have finally added a shaker EXS24 instrument and selected Control
‘R’ which copies our new additions to the same length as the Pandeiro.
The shaker was also quantized before the copy. The quantize setting is
automatically applied to any copies. Although we are quantizing
everything here, it may not always be necessary and may even be too much
in some instances. This is down to personal preference and the
invaluable help of your trusty ears.
Screen shot 25
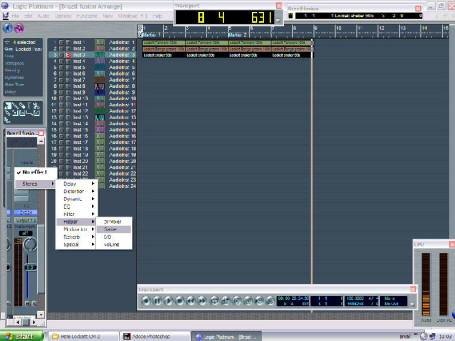
It is very common to find some percussion sounds that don’t cut
through, even though you might have thought they were recorded at a
decent level. Here we have added the Gainer from the helper menu to
boost it by a few db. Panning can also help it pop out of the mix as
mentioned last issue. These are our three percussion voices. It sounds
quite full and uncluttered. There is sometimes the misconception that
you have to add loads of percussion instruments to make a big sound but
is surprising how effective just a few can be. Knowing when to stop is
certainly a gift!
Screen shot 26
You might then want to add a drum groove from a plug-in such as
Stylus. Here we have added a loop at the right tempo but it clashes with
the quantized material.
Screen shot 27
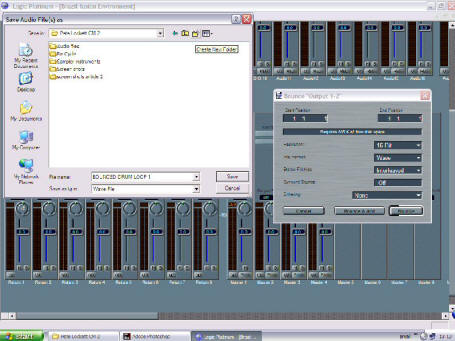
There is a simple solution to this problem. Select the new part,
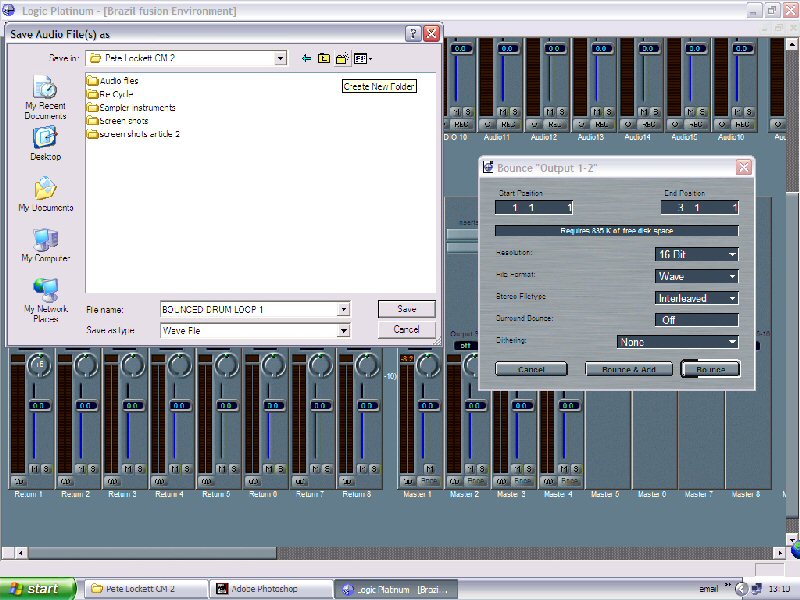
solo it and set the locators for a four bar section. (Or whatever length
you choose). Go to the mixer page and bounce the solo mix down as a new
audio file. Go through the Re-cycle process and make a new EXS24
instrument and sequence from the Re-cycle file. Then quantize this new
sequence with your template, delete the old drum part you bounced down
from and you should have what you want. This process would obviously
work for any appropriate material you wanted to use, even if it’s not at
the right tempo. One of the advantages of this whole scheme is that in
effect you’re using audio file, but if you change the tempo of the song,
everything will change to the new tempo. The other thing worth
mentioning is if you want to use an EXS24 instrument that you have
already created from a re-cycle file. In this instance, because you are
not making the instrument from scratch, when you select the instrument
from the drop down list it will not create the MIDI sequence in the
arrange windo. To do this you need to select ‘Create sequence from
recycle instrument’ from the options menu on the front of the EXS24.
This will import the sequence at the song marker point.
If you don't use Logic and can't use the
EXS24 in this
way there are alternatives. The best way to import rex2 files is
to use Stylus RMX. With the use of the sage converter you can
import your prepared rex files into stylus and then drag the midi file
into the arrangement to achieve the same result, whether you are working
in Nuendo, Cubase, Cakewalk, Sonar etc. There is also a stripped
down VST version of the EXS24 for these programs but you do not have the
options available to import rex files, only already created EXS24
instruments. You also cannot create a midi file from the rex file
in this version.
| Pandeiro, Brazil's
national drum |
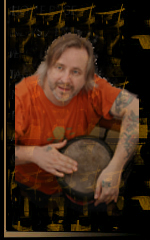
Pandeiro is the national instrument of
Brazil and is a
single headed tambourine traditionally made with stretched animal skin
parchment. Modern drums often have plastic heads, which provide a
slightly brighter tone. The drum is usually tuned high
and is played
with the thumb, fingertips and wrist of the right hand whilst the left
hand shakes and adjusts the pitch with a finger inside the drum.
Pandeiros are an integral part of
Brazilian music and the craft of the
instrument is taken very seriously all over the country. One of the
attractions to the instrument is the juggling tradition and there are
even national competitions for Pandeiro juggling in
Brazil.
The actual articulation of the strokes on the drum is quite a tricky
technique and gives it its distinct Brazilian feel.
Thumb-Fingers-Heel-Fingers is the basic flowing sixteenth pattern of the
right hand with the left hand muting on the first and third beats of the
bar and un-muting on beats two and four to create a deep open tone. It
is actually the reverse of a ‘Kick-Snare’ feel that we are so familiar
with. The rhythm used for this article is slightly more involved than
this though. Even though the instrument is so popular in
Brazil, it is
less frequently used in carnival because it is not loud enough to have a
big impact for out door events.